Thursday, February 24, 2011

some shorts & some dinner

I headed over to The Remnant Warehouse the other day with a good friend and we both walked out with exactly the same things! How could we pass up a metre of stretch denim for $4!! We also got some other heavy material for the boys in our lives that was also only $4 per metre too. My girls live in shorts and tights and have been looking for a little pair of denim shorts for ages. So, I made some! I used a elasticated pants pattern from Making Children's Clothes sewing book and made a few alterations for a better fit. I'm not one for frilling things up too much, but I found these crochet hearts from Peg's Pieces yesterday and thought they'd look a bit cute on the back of the shorts. The hearts were about $4-5 each, so the total cost for these little shorts were only about $10 each! Bargain I say. Well that was what I told my husband over dinner last night, justifying my fabric purchases "for the family"!!! I also added to him that without the crochet hearts the shorts only cost $2!!!!!!!!!!!!! Oh and I also have enough denim left for at least another 2 pairs.. That makes it only $1 a pair! So, here they are. The girls love them!


This is the other $4 a metre material in a heavy brown that I also made yesterday. While I was checking out the crochet hearts I found and liked this trim to make the shorts a bit more girly. I have just about finished Lacie's pair but I was 5cm short of the trim and need to get some more! Tip: Measure how much you need and don't guess..


And these are for little Mitchie. I made my own pattern for these shorts as I don't have any patterns in his size (00). I am still thinking of adding a pocket or a patch somewhere but just not sure yet.


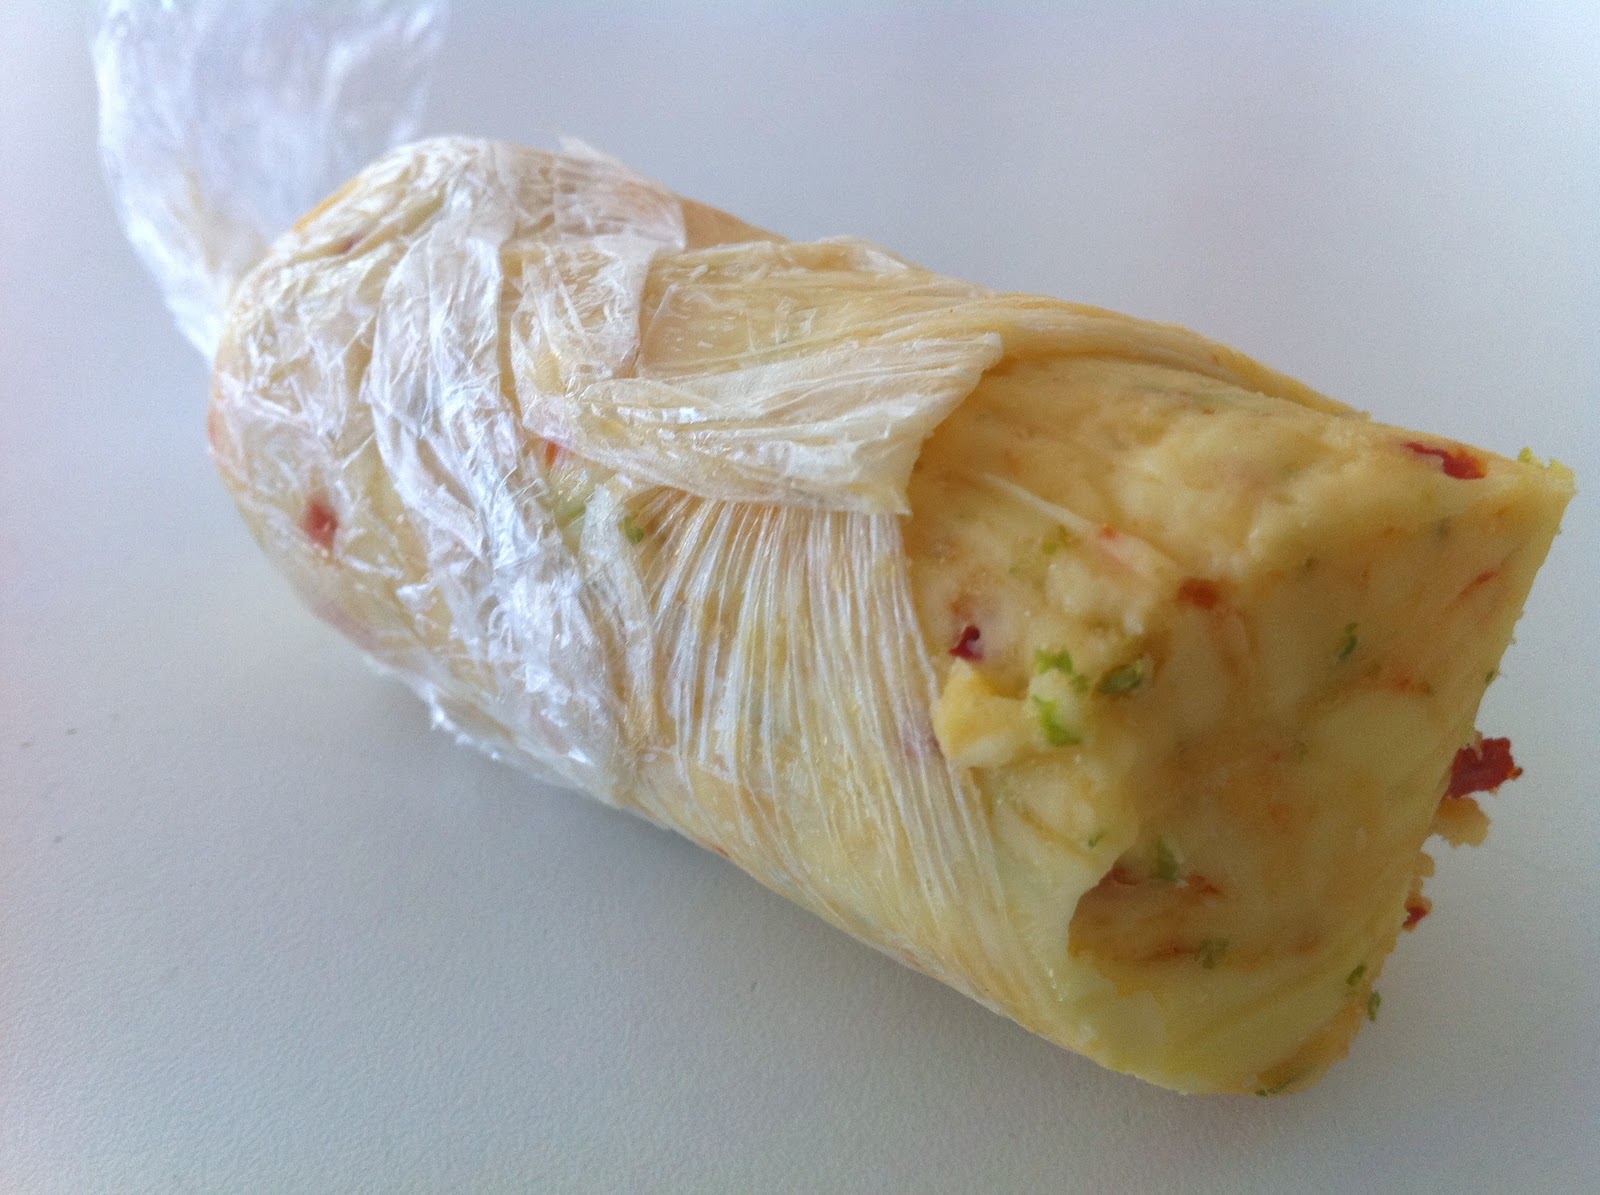
After another day of fabric shopping, I needed to prepare an easy dinner for my gang. It was deeeelish!! As simple as steak, baked potato and beans... but the deeelish part was the butter mix I made from a mag I was flicking through.


100g of softened butter
1-2 crushed garlic cloves
1 long red chilli seeded and chopped
1 tbsp of lime zest

Mix together and put in glad wrap and roll into a log. Put it back in the fridge and when meat is cooked to your liking and is on your plate, cut a few slices of this butter mix and put it on your steak. Mmmmmmmm! Too easy. I have stacks left over, but it is sure not to go to waist. A slice in my mash, or on chicken or on broccoli or anything..


For the next week I am doing a clean out of my freezer, fridge and cupboard, so it will be total miss match dinners until I'm ready to re-stock again. I'm actually doing a clean out of my wardrobe as well. I have 2 bags ready for the raggy bin already. So look out kids toys!

Sunday, February 20, 2011

how to make tights

I am really happy with the tights pattern I made for the girls, I wanted to share how it did so you can do it too!

When you are ready to make a pair of tights, make sure the material you pick is stretch. Stretch both ways (across and up and down) is best, but I used a stretch knit that only stretched sideways and it worked just dandy..

How To..
  • You will need and old pair of tights (roughly the size that you are wanting to make)
  • Lay them inside out on a flat surface and cut up the inside of one leg and cut all the way around to the bottom of the other leg (see below)
  • Now cut the groin seam (see below)
  •  Take one piece of your tights and open it out and lay it on some paper to trace the outside (see below)
  • There is a slight angle of the waist as this makes the back (higher end) and the front (lower end)
  • When you trace your pattern, add about 2-3" to the top as this will be the allowance for the waist
  • Try and put markings where 3/4 length would be and full length etc
  • When I cut out the paper pattern, I left about a 1/2" allowance around the pattern just incase, cause you can always take things in but not out! (see below)
  • Pin you pattern on to your folded right side facing stretch material and cut around (see below)
  • Below is what it looks like when you have cut it out (bad light in picture I know)
  • Pin the right side and left short (crutch) seams together (see below) and sew (I used an over locker but you can use a normal stitch on a sewing machine. Maybe think about using a jersey needle)
  • Pull pants open so that the opposite groin points meet
  • Pin the inner leg seam together matching the groin together first and sew
  •  Turn right side out now so you can check your work out!! See below
  • Turn inside out and turn top edge to make elastic waist (I over locked the edge but you don't have to as most stretch material doesn't fray)
  • Pin and sew leaving a 2" gap at the back middle seam to thread your elastic through, see below
  • Make sure the width of your elastic you use is the approx width of your turn
  • Use a safety pin at the end of your elastic so you can easily feed it through your little tunnel your just made
  • Feed it all the way through to the other end (making sure you don't let the other end of elastic go through and disappear)
  • Safety pin it together and double check the right waist size for elastic with your child an sew elastic together
  •  Now you can close up gap and your waist band is done! (see below)
  • Hem the bottom of your tights
  • Your done!

This is a pair that I had mad the other week and I have made 3 pairs since. Once you have your pattern worked out, and there may be some small alterations once you make your first pair, these tights seriously take less than 20 mins to make!

There is another way of making your own pattern with out having to cut up anything... I will show you that soon.

I'm certainly no expert on this whole sewing thing, but I just give it a go the only way I know how, and most of the time it works. Feel free to leave me some tips or corrections if you think it might help me and other sewers :)

Thursday, February 17, 2011

WIN "sew la tea do" @ meet me at mikes

Pip Lincolne is giving away her newest book called Sew La Tea Do!!!  I have it already and LOVE IT!! All you have to do it leave her a comment on her blog post here. I had to share with everyone cause I think she is amazng :) Good Luck!


Did you check it out and leave a comment for her?

Do you want me to share things like this for you when I find them?? Let me know, cause this blog thing keeps evolving into loads of things..

Tuesday, February 15, 2011

my fabric canvas art

My bedroom wall has been a big empty space for nearly 2 years now! I just couldn't commit to a colour or design or piece of art work... The requirements were - not to be too feminine and not like any traditional patchwork fabric design, modern with a warm feeling and a pinch of romance etc etc.. Easy hey! Not. In my travels last week I found some french inspired fabric and have been thinking about it ever since. So I headed back to Pitt Trading today and ended up with this print that kind of sort of ticked all of our boxes. I'm happy. I keep walking past my room and glancing back, then walking in and out and in and out again... I read the girls their books in our bed tonight just so I could keep looking at my new space!

still need to be hung on the wall

Some quick easy steps to make your own.
  • Buy your canvas/s first (then you can work out exactly how much material you will need)
  • Find your fabric
  • Load you staple gun (I bought mine for about $22 from a crafty gift shop)
the girls got to my canvas before i did
  •  Lay your fabric on the floor or table and place canvas on top, make sure it's laid out the right way and figure out which way your canvas will be hung etc..
  • Cut around the canvas leaving about a 2.5" allowance for the folding over to the back, see below
  • Iron your piece/s
  • Fold over bottom edge and staple in the middle, see below
  • Do the same for the top and then both sides making sure that fabric tension is ok
  • Staple again about 5" either sides of your first staple
  • Corners should be folded like hospital bed sheet corners?? or how ever you want, then staple in place
  • Check if you need any more staples


Then your done!

Overall Cost
2 x (60cm x 75cm) canvas $30
1 metre of fabric $15
Stapler $22
TOTAL $67

Have you got some empty space?

Monday, February 14, 2011

library bag & school books done!

Last night was my deadline that I gave myself to have finished Lacie's Library Bag and to have covered her kindy scrap books with contact. It was a late one, but I'm done!

The girls and I all wore our little Valentine Heart Pins today and Lacie has one in her pocket for her teacher. She also took her paper hearts that she made the other night too to hang in the class room.

So, keeping with the "make the most with what you've got" Lacie's Library bag is from all scraps in my cupboard. We didn't buy one extra thing. We were excited to use the little girl that I embroided the other week from one of Lacie's drawings!! Here it is...


It's fully lined with the same material as the straps. The back is a heavier material that I just quilted across in a few rows. We love it.

On a separate and random note... I am listening to some music that I downloaded a few days ago (Adele - Album called 21 and the killer song is Someone Like You) and a beautiful bamboo musk candle burning from Aunty Maz, and oh my goodness me.. music just kills me! I'm one emotional little thing. It sometimes actually hurts to listen to music but it's an addictive feeling that I just want more of and loader the better. It's just baby and I today, and he is asleep. I need crazy kids running around and a sewing machine going or dinner to cook or gas bagging with friends cause when it's just me, I think too much! I am banging on a bit sorry.. Thanks for listening. Oh look, baby just woke up! Back to planet mum. Planet Sarah is nice to go to just sometimes.

Righty-oh, cover books, done! My first attempt with bright contact totally failed as it was the wrinkliest thing I have ever seen and could not let Lace take it to school looking like that... So, hmmmm what do I have in my cupboard?? Some brown paper roll, some clear contact (surprise surprise) and some old drawings that Lacie had done that I had kept cause I fell in love with them. I needed my husband to help me put the clear contact on cause that was too much for me. I'm used to imperfections but I wanted this to be perfect. Thanks Heathie x


I'm now off to do a cook up of some baby food to freeze for the week, listen to more music, hang out on the floor with Mitch, maybe tidy up a bit and play on the computer, and before I know it, it will be school pic up time... all sounds good to me.

Turn the tv off in the background and put some music on x

Sunday, February 13, 2011

kids valentine craft by lacie..

It was very late last night when Lace and I searched in our craft cupboard for some love heart making supplies!

We found (and you will need)
  • Coloured paper
  • Cardboard to draw yourself 2 x heart shapes
  • Pencil to trace hearts
  • Scissors
  • Sewing machine with red or what ever coloured thread you have

trace your hearts

cut them out

get adult hands to sew together

hang for the world to see

of course I have to have a turn too!
Lacie is giving hers to her teacher tomorrow to put up in the class room for Valentines Day. Major suck up I know!

Later today we have 2 more projects to complete before school tomorrow. Lacie's Library Bag & cover books in contact. Speaking of Library bags, I have received a few photos of some library bags that some readers have made!! Ok, she is my best friend, but she is still a reader! Did you make one of the library bags? Email me a photo if you did!!

Saturday, February 12, 2011

valentines day DIY's ideas

045

If you have or know of any valentines day DIY tutorials, leave a comment here with the link!

my own little designs..

I have been walking past this stretch knit material for a while now at my local Peg's fabric shop, but I didn't have a pattern for anything stretch knit for the girls?? I have tried to find some basic patterns, like leggings/tights and simple little dresses for this fabric but I just couldn't part with $25-$30 for a pattern for something so basic. So, I made my own!! Wooo hooo for me. While big sister was at school, Bon and I had a ball doing this little photo shoot in their favorite climbing tree. This fabric is by Patty Young at about $26 per metre and I bought 60cm ish of each and I reckon you could get 2 x tights out of a 60cm piece, so that is actually ok price wise for $8 each for a pair of hand made tights. I actually popped into Peg's today for some different designs of this stretch knit and was told to allow approx 30% SHRINKAGE, so make sure I wash before making! Yikes.. I did't for this lot, but I guess I wont make that mistake again! My measurements might be a bit off too! I might also just not ever wash this out fit! Only tricking, I'll wash it and watch it shrink. Might fit a 1 year old instead of a 3 year old.. ha ha oh well. So here is my little pattern designs.

top/dress & tights

little dress

close up
chilling out after her big photo shoot!
I also had some left over kind of stretchy fabric from a dress I made the girls months ago, so I thought I would keep practicing on my pattern until it is perfect! Bon and Lace LOVE these cause they pretend they are playing dress ups and putting on some lady stockings. They do look like stockings and are a bit see through, so I guess they are stockings?!? So I guess I can make stockings too now!


And finally, last night we took the kids to Bondi Beach for a swim and a picnic dinner. Here is Lace wearing her little dress that I made in the same stretch fabric that I had left over from a dress I made myself. Oh and look, the kids are stitting on their little Scrappy Mat I made them, oh and Mitch has his little t-shirt on that I made him... ahhhh soo fun for me to see!


It's always nice to hear from who ever is checking out my blog, so please feel free to leave me a comment below on what you think of my little basic designs :) Tips are welcome too!!

Thursday, February 10, 2011

baby air force boys..

I found these cute little Air Force iron on's at Pitt Trading in Ramsgate the other day and just had to have them. They were only $2 each! One for my Mitch and one for little cousin Max. They'd also be way too cute on the back pocket of a pair of little boys jeans or a plain hat.


There isn't a day that goes by that I don't have a shocker some how... well this day was me being impatient as usual and I didn't even check the sizes of these little t-shirts, so I ironed Mitchies one onto a size too small! It only just fits him! Oh well.. silly me. No the end of world is it!

I have been very busy the past few days with loads on and only a few hours of creating. I am however on a new obsession for this week, and that's stretch stuff! The other week it was felt, before that it was cooking, crocheting, embroidery!! Too much to do!! So, I have a few items already whipped up but I will wait till tomorrow for the girls to do a bit of a fashion parade for me before I show them off. All my own designs as well! Ha ha, that sounds like they are really awesome.. they're just good old basics. Until then.. good night :)

yummiest mayo in town!

My good old ham sandwich has had a very quick and tasty make over!
My friend bought me this mayo ages ago thinking I might like it... I have been hooked ever since.
So now as your friend, I thought you might like it too!
I get it from Woolworth's in the fresh produce section (near the bags of pre packed salads etc). I think it's about $5. There is a bit of a kick of chilli.. totally yummo.

Neil Perry Fresh - Lime & Chilli Mayonnaise
Post a omment and let me know if you are in to it!!

Monday, February 7, 2011

a lesson..

Today with only 1 child on my hip, I took my sister-in-law fabric shopping, then back to my place for a solid 8 hour sewing session!

We spent about an hour at a great fabric shop that has amazing dress fabrics (Pitt Trading in Ramsgate, NSW) as we were determined to make her a new dress!! My sister-in-law bought some nice stretch material to make the Coastal Breeze dress by Make it Perfect. I have made a few of these and they are great! I bought some great light weight material that was half price for some more Kaftan's.

This was her first time on a sewing machine and here she is sewing away.... We were ABSOLUTELY determined to get the dress finished before she left. Some sewing, some wine, some dinner, some more sewing...


And Hello! Here she is in her very own hand made dress!!!!!!!!!!!!!!! I'm just loving the neck line. Looks kind of 1950's. Just Beautiful x

cheers! Yay you x
We high five'd each other and she was very pleased with herself, as she did everything! And just to remind you, this was her first time sewing!!

This sewing thing is contagous...