* Library Bag Tutorial * Library Bag Tutorial * Library Bag Tutorial *

Ok, so I have a million photos to go with this Library Bag Tutorial, so I hope it helps.
I seriously love my scrap bag of material and love making something from nothing. Lacie has her little friends 6th birthday party tomorrow and she is starting school this year. Due to my "hand made 2011", the deal I have made with myself, I need to make a present. A Library Bag is PERFECT!
Supplies
- Material of your choice (scraps for patchwork option)
- 2 x (13.5"W x 16"L) outer
- 2 x (13.5"W x 16"L) inner lining
- 2 x (17" x 4.5") straps
- Quilted Fabric - optional if you want the padded kind of look (not floppy) there is a picture of what I am talking about a little down the page
- Sewing Machine & Thread
- Tape Measure
- Sewing Scissors
- Assume an approx 1cm seam allowance
 |
| Hmmm.. I wonder what the kids and I will pick?? |
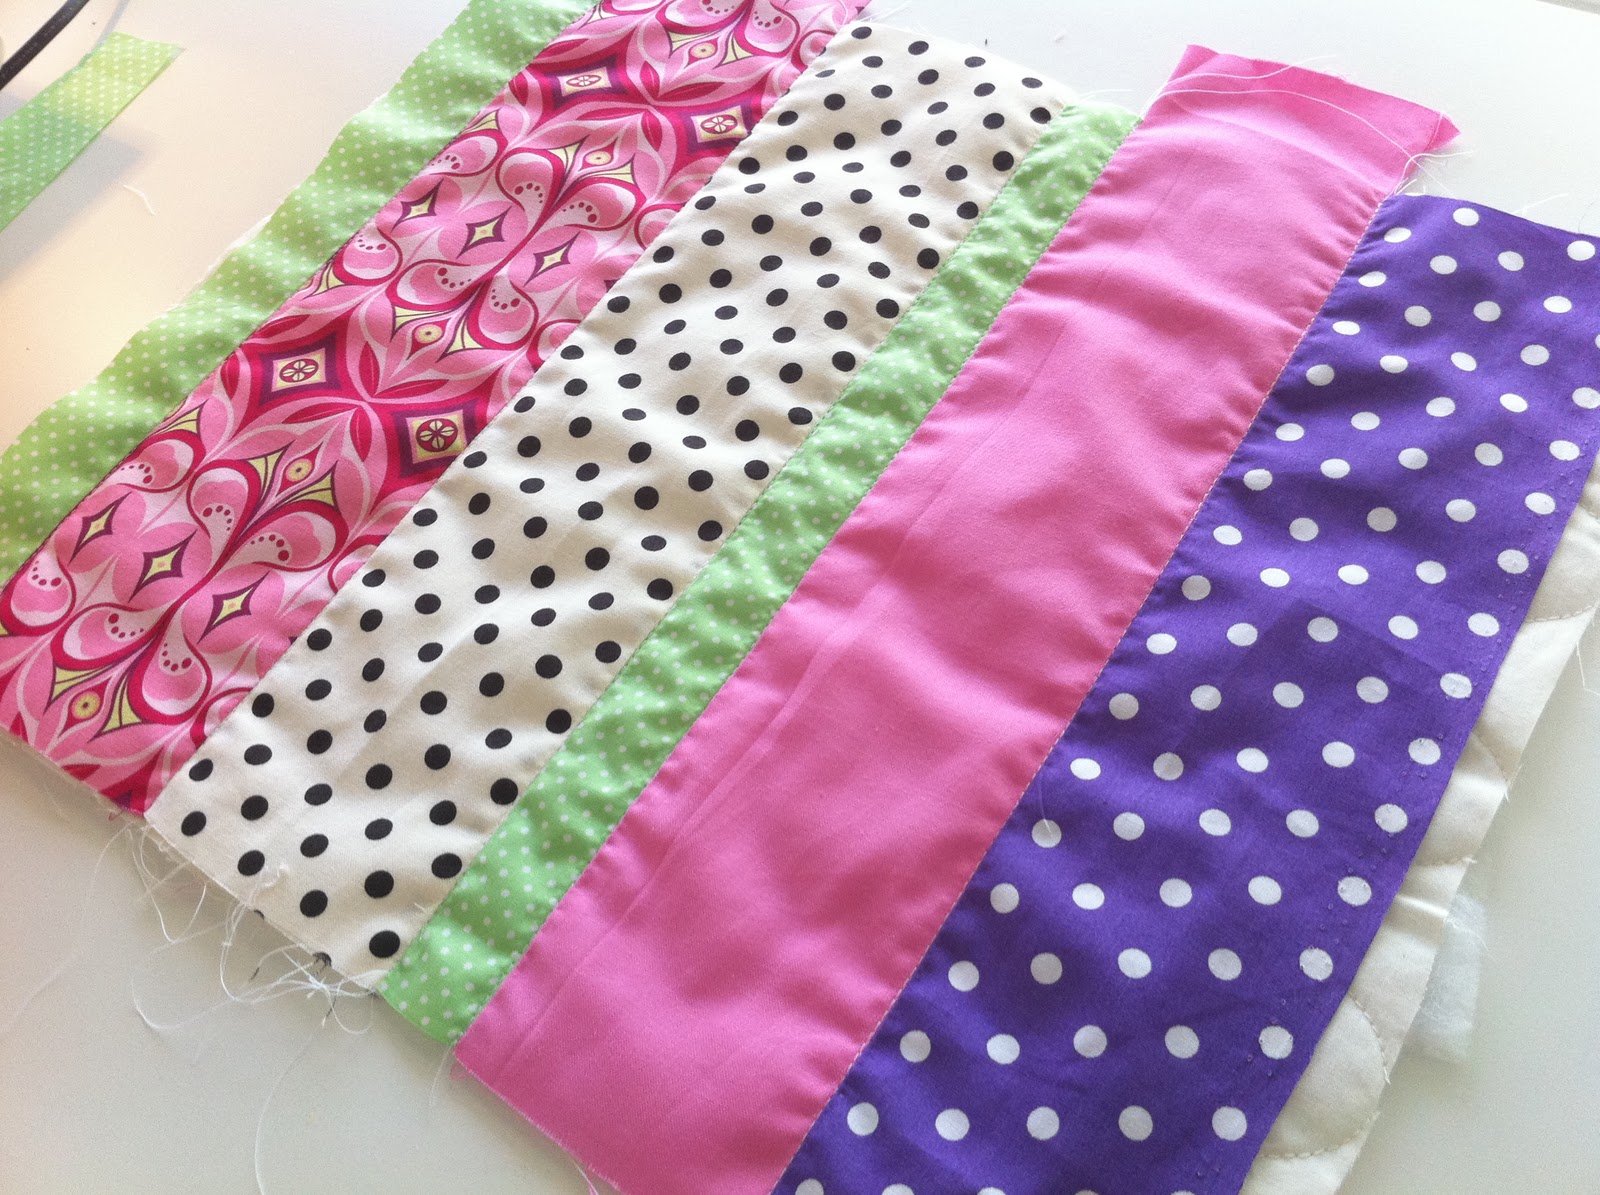
- Get your scraps in some sort of order so you can visualise what you want, and roughly work on 2 x (13.5"W x 16"L) see below example
 |
| x 2 |
- Once you're happy with what you have designed, pin right sides together and sew an approx 1cm seam allowance straight down

- Get your next piece and again, right sides together, pin and sew

 |
| and so on, until all sewn together |
- Get the iron out and press seams open on the back, this will make sure you have a flat finish on the front
- Measure and trim your 2 pieces to 13.5"W x 16"L

- If you want the padded quilted look, cut 2 x (13.5"W x 16"L) see below example

- Place your patchwork piece on top of quilted fabric and pin along the stitched lines

- Sew down each seam, this will secure quilted fabric and patchwork pieces together and also give it the quilted look

 |
| are you with me??? great, if not email me |
- Get creative and add stuff to the bag, a letter, a button, some lace, some yoyo thingies, a pocket etc etc etc....

- I hand sewed this letter on and I think it looks way better then sewing it on as I would normally do

 |
| 2 pieces so far |
- Cut 2 x (13"W x 16"L) see below example for lining
- Pin together and sew both sides and bottom together leaving the top open

- Get your 2 outer pieces and iron over top raw edge by approx 1cm to the wrong side

- Pin these pieces right side together and sew down both sides and bottom to create an inside out pouch

- Turn it right side out, see below

- Take your lining and iron top raw edge over by approx 1cm to the wrong side

- Place lining inside your quilted pouch wrong sides touching, and the opening on both are aligned and pin together, see below

- Cut 2 (17"L x 4.5"W) for straps
- Take one piece and iron in half length was, then open again and fold raw long edges to meet the middle crease you had just ironed, repeat with the other raw side so that both raw long edges are now touching, now fold this in half so there are no raw edges showing and you now have a strap, see below right for an example and what it should look like (hope that wasn't confusing!)

- Pin straps and top stitch down both sides, see below

- Measure 3.5" in from both ends and place strap ends inside the lining and outer pieces to sandwich straps in and insert approx 1", pin in place and repeat with both straps, see below
 |
| Woo hoo, we are just about there!! |
- Top stitch approx 2/8" in from top edge to secure the lining, the outer and the straps into place, see below

- Yay, best part, your done!

You could use these measurements to make a very simple library bag with plain material, no patchwork and no quilting etc.. Now that I have finished it, it is actually a really nice little bag and could even be a bit too nice for a library bag!
Leave me a comment on my blog below if this has helped you is any way, as I would love to do more of these if people are interested.
Happy making x
I LOVE this Sarah. The little girl you made it for is gonna love it!! Cant wait to see Miss Lacie's one. I will definatley make one of these once i learn how to :)
ReplyDeleteLove!! So cute!!
ReplyDelete